Soap Photography Tutorials: Show Color, Texture & Packaging
Soap & Bath Products · CraftToCamera
Make the bar easy to inspect: accurate color, visible thickness, a useful surface detail and actual packaging.
The soap has a beautiful swirl in your hand, but the photo makes it look like a pale block. Before reaching for a stronger filter, turn the bar and look at its edge. You may be showing the wrong face, or losing the outline against a background that’s too similar.
I’d start with a representative bar and four useful views: the design, thickness, surface detail and real packaging. Then we can add a styled scene if it helps. The aim is to keep the colors believable and make the bar easy to inspect, without letting flowers, towels or a tall stack hide the soap itself.
Choose a bar that represents the product you sell
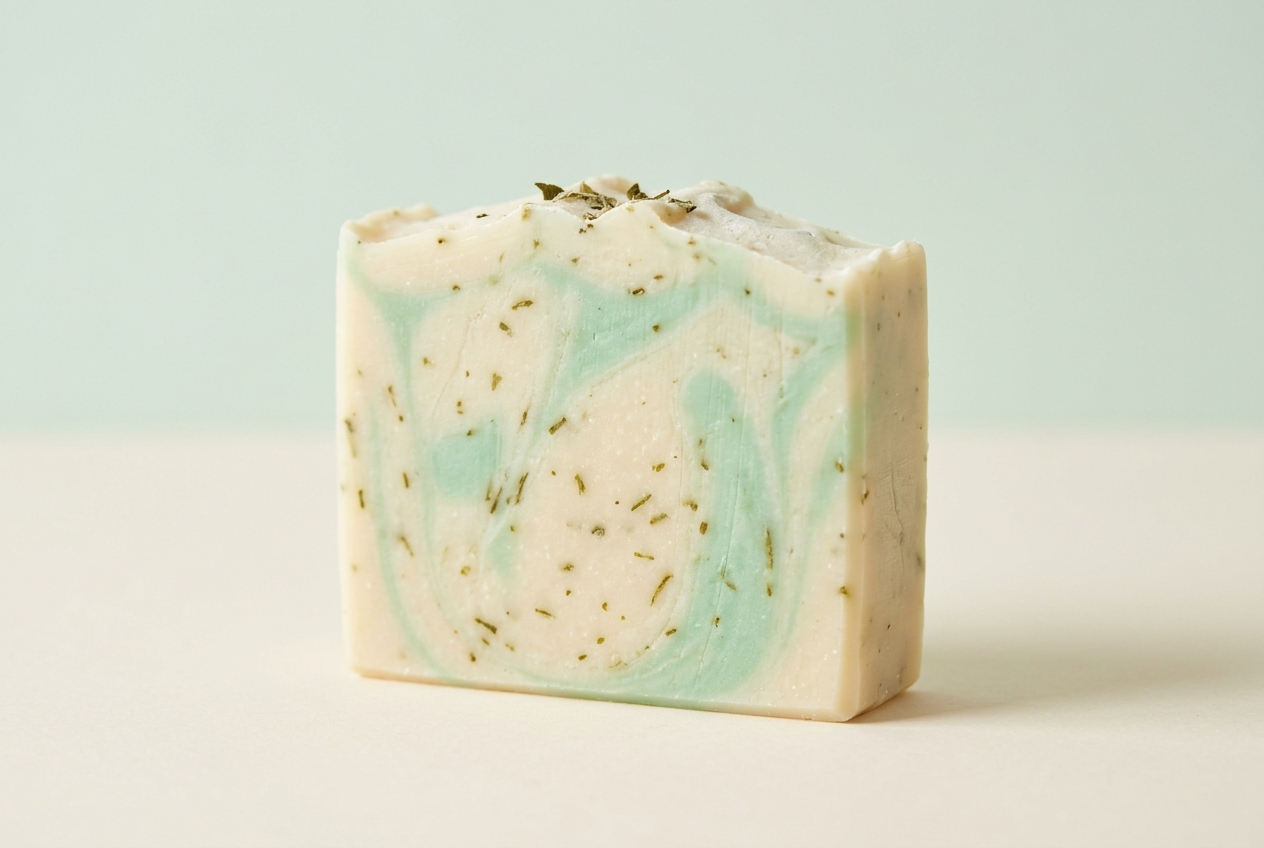
Pick a finished bar that gives a fair impression of the product. Handmade variations can be part of the design, particularly with poured swirls, layers or textured tops. If every bar differs, photograph a representative example and consider a small group view that shows the normal range of variation.
Check for loose crumbs, dust and marks from handling. Clean or tidy the presentation only in ways appropriate for the actual soap. The purpose is to show the product clearly, not to make an example look different from what customers receive. A polished photograph and a truthful photograph should work together.
Decide which surface matters most. A cut face may show the swirl, a side may reveal the layers, and the top may show a decorative finish. Write down those features before choosing props. If the main selling detail is the cut face, do not begin by hiding it behind a label or a stack of other bars.
Separate the outline from the background
Start with a plain, matte surface. A cream bar can disappear on a white background, while a very dark surface may make its pale edges look brighter than they are. Try a background that differs enough in tone for the outline to remain visible without turning the whole scene into a contrast exercise.
For a colored bar, look for reflected color from nearby surfaces. A bright pink cloth or green wall can influence the appearance of a pale edge. Move distracting colors away and check a test photograph. The background should support the soap’s color rather than become part of it.
Keep the first arrangement simple: one bar, a clear outline and enough space around the edges. Add a second bar when it explains the side or the variation within a batch. A tall stack may look abundant, but it can hide the exact face you want the viewer to inspect. Photograph the clear version before experimenting with a more styled arrangement.
Use light to show the cut face and textured top
Place the setup near soft window light and turn the bar gradually. Light crossing the surface can reveal small changes in height, while light arriving from near the camera may make the cut face look flatter. Neither position is automatically wrong; choose according to the feature in that photograph.
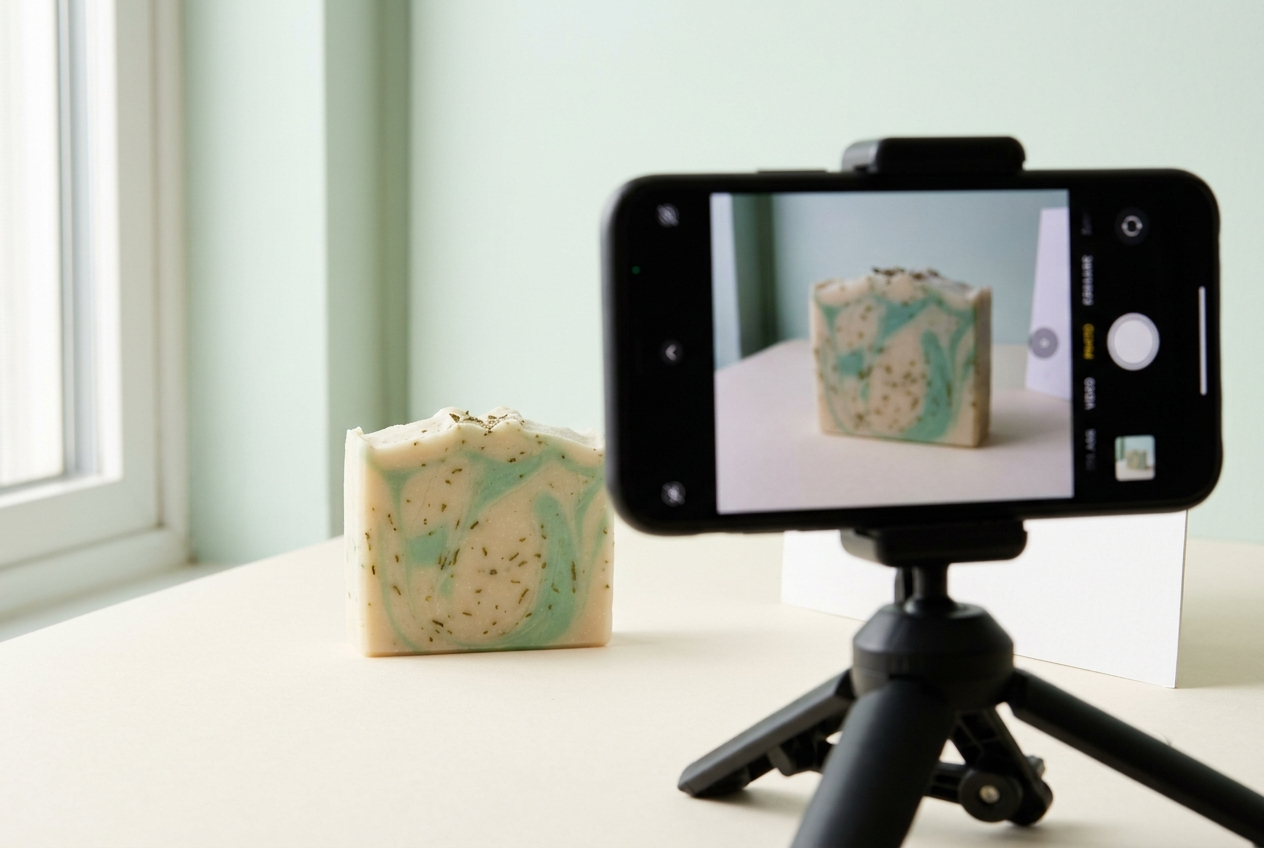
For a subtle swirl, focus on making the colored areas distinct and accurate. For a textured top, a slight side angle can help show the raised form. If the shadow becomes so strong that one side disappears, bring a white card into the opposite side of the setup, outside the frame, and compare the result.
Keep the color consistent through the session. Mixing daylight with a warm ceiling light can create two different color casts across one bar. Turn the setup or simplify the lighting before trying to correct separate areas in editing. If the light changes substantially, take a fresh main view so the set still feels like the same product.
Build views that explain the whole bar
Begin with the surface you consider the front. Position the camera so the design is easy to read and the bar does not appear unintentionally tapered. Then make a three-quarter view that shows both the face and thickness. This second image helps a flat design become a recognizable object.
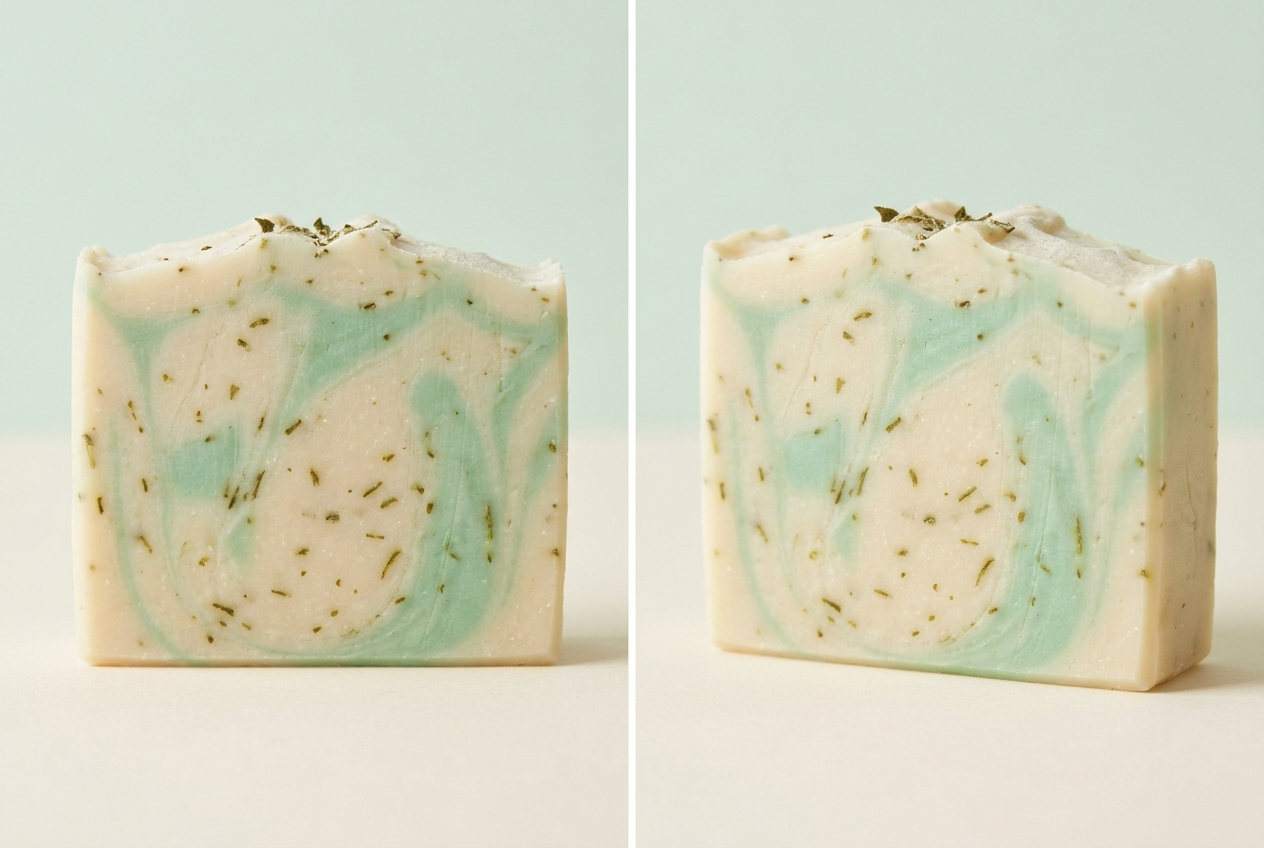
Add a close detail of the top, swirl or layer transition. Keep the camera at a distance where it can focus, and check the saved image at a larger size. A beautiful arrangement does not make up for a detail that cannot be inspected. If the phone struggles when very close, move back and choose a less extreme crop.
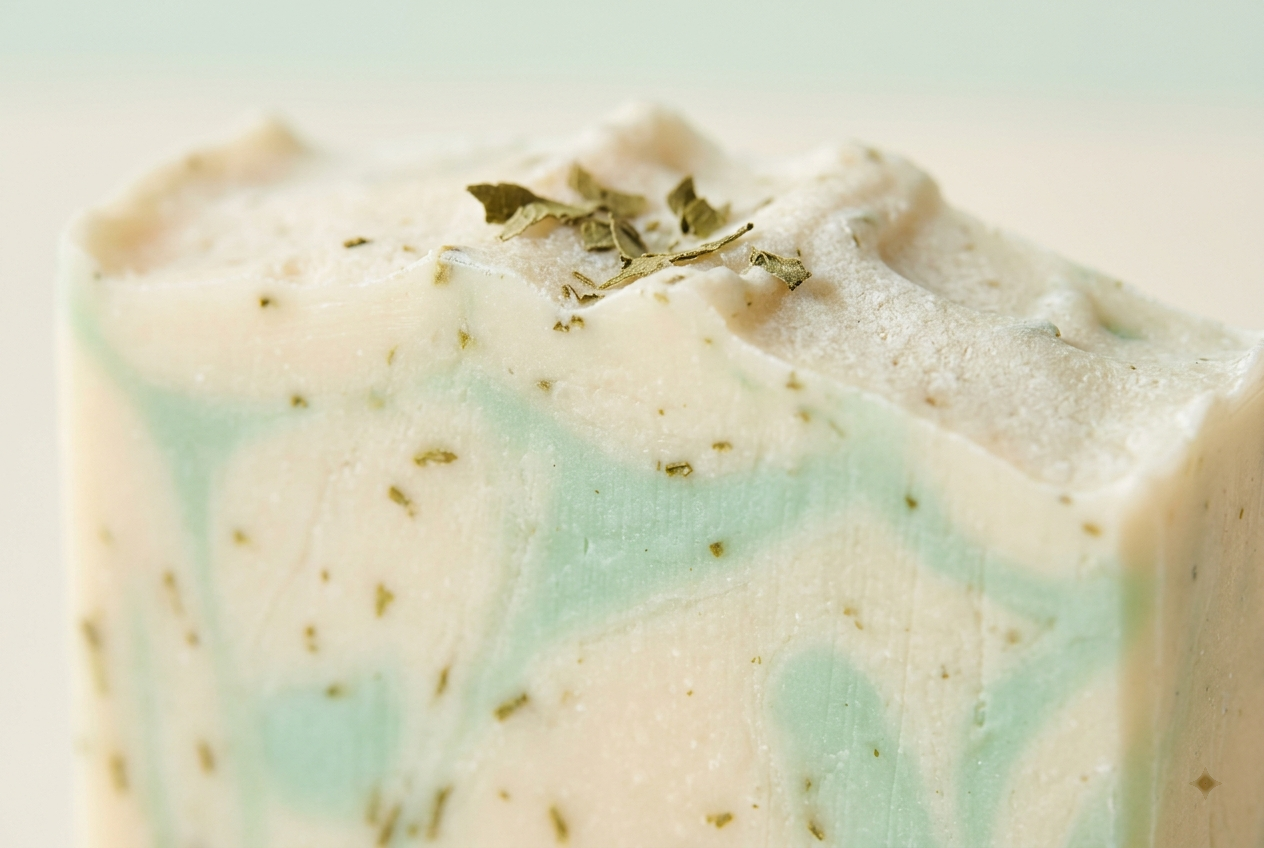
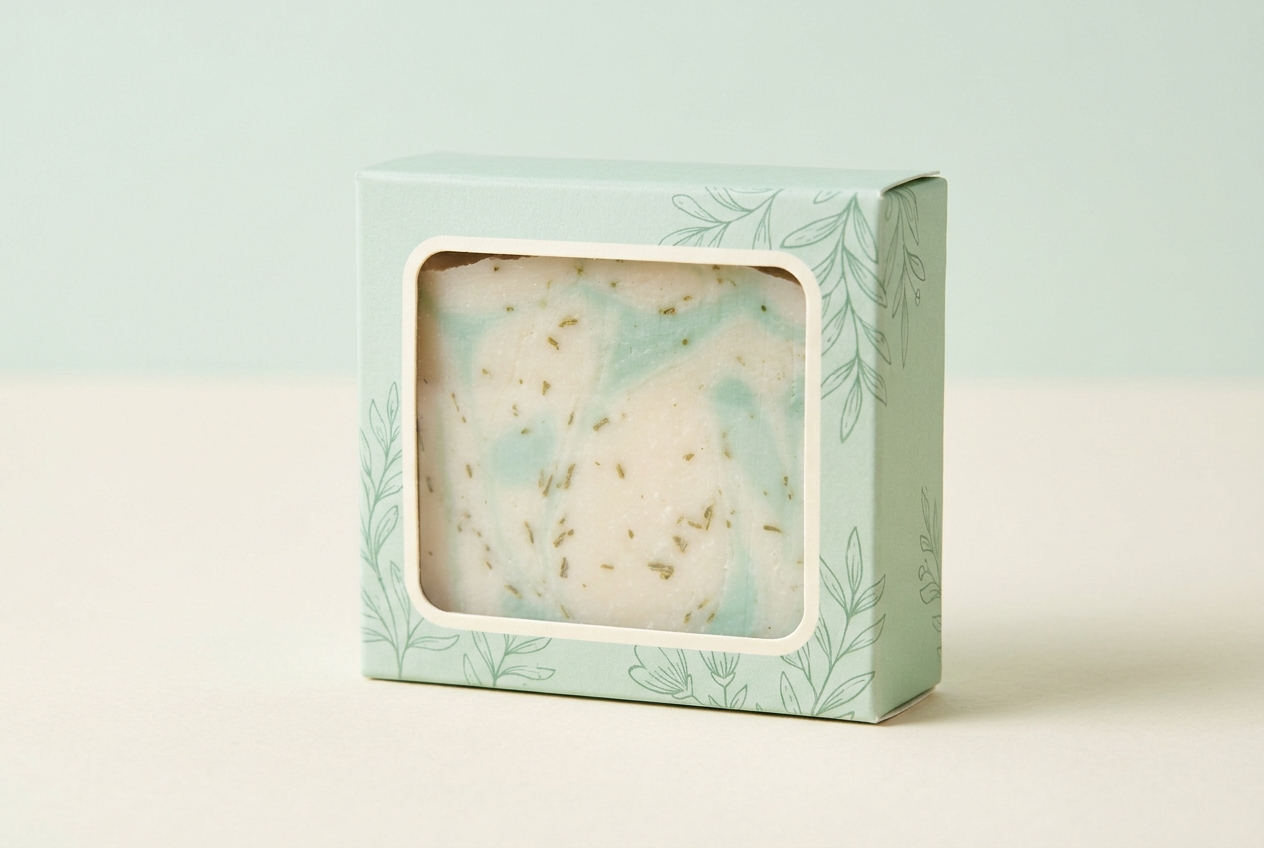
Finish the basic set with the side or back where relevant, followed by the wrapped product. A customer should be able to connect the unwrapped bar with the packaging they will receive. If the label covers the swirl, the separate unwrapped image becomes especially important. Do not make the buyer guess whether two photographs show the same variation.
Give scale and quantity their own space
A soap dish or a towel can suggest a setting, but neither gives a reliable measurement by itself. Include the bar’s dimensions and the product information relevant to the sale in the listing. A supporting photograph with a simple scale reference can help, as long as it doesn’t obscure the bar.
If you sell a bundle, show its actual combination or clearly describe the photograph as an example. A group of six bars can suggest a six-bar purchase even when the listing is for one. Decide what the first image communicates at a glance, then use captions and product details to remove ambiguity.
Photograph related variations in a consistent arrangement. Keep the camera angle, light and background similar so people can compare the designs. If one scent is shown much closer than another, the bars may appear different in size. A planned comparison is more useful than asking someone to compare separate scenes with different perspectives.
For soap photography tutorials, compare the dry cut-face view, textured top and packaged bar together; the colors and finish should still read as the same product.
Keep props from becoming unintended ingredient claims
Flowers, herbs, citrus and oils can make a scene feel appropriate for bath products, but they also communicate information. A viewer may interpret a lavender stem beside a bar as an ingredient or scent cue. Use that association deliberately and only when it fits the product information.
You can create a calm setting with texture and light instead of surrounding every bar with ingredients. A quiet surface, a folded neutral cloth outside the main outline, or the actual packaging may be enough. The product should remain the clearest subject when the image is reduced to a small preview.
Separate styling from product claims. A photograph does not demonstrate a skin benefit, and a decorative prop should not imply one. Keep captions focused on what the image can show, such as the swirl, packaging or collection. Use the listing’s factual product information for the actual ingredients and intended use.
Common mistakes in handmade soap photographs
Wetting every bar for shine. Water changes how a surface looks. Keep a dry, accurate main view and use any wet styling as a separate, clearly contextual image when appropriate for the product. Don’t let it become the only representation of the finish.
Stacking away the interesting side. A stack can hide the cut face or top. Turn one bar toward the camera and let it explain the design. The rest of the arrangement should support that bar rather than compete with it.
Increasing saturation until the swirl looks stronger. A more vivid image may attract attention but misrepresent a muted product. Compare the photograph with the real bar under neutral light and preserve the actual relationship between the colors.
Leaving the quantity unclear. Photograph what the buyer receives, or explain a styled example plainly. A beautiful group scene should not create uncertainty about whether the listing includes one bar, a pair or a complete set.
Edit for a coherent product story
Choose the clear main view before choosing the most decorative one. Review the set together and ask whether the color, thickness and finish remain consistent. If the soap looks peach in one image and pink in another, investigate the lighting and color adjustments rather than assuming the difference is harmless.
Crop for the useful information. Keep a complete outline in at least one image and leave enough space for alternate display crops. Use a closer crop when it explains a specific feature, not as a replacement for the full bar. Straighten the main face if an accidental tilt makes the shape difficult to judge.
Save originals and keep notes on the arrangement that worked. Record the background, the direction of the window and which side of the bar faced the camera. For a new batch, those notes help you repeat a recognizable style while leaving room for the different swirls or colors that make it handmade.
Frequently asked questions
Should the first soap photograph show the wrapper?
Choose the view that most clearly identifies the product, then include both wrapped and unwrapped views in the set. If packaging hides the swirl or textured top, give those features a separate clear image.
How many bars should be in the photograph?
Use the quantity that fits the purchase or clearly label an example arrangement. One bar is often enough for a main detail, while a group can show normal variation or the contents of a bundle.
Why does my pale soap look yellow?
Check for warm room lights, nearby colored surfaces and strong editing filters. Simplify the light first. Compare the image with the actual bar before making a small color correction.
Can a close-up replace a full-product photograph?
No. It can explain a surface beautifully, but it doesn’t show the whole outline, thickness or quantity. Use it alongside a complete view so the buyer can connect the detail to the actual bar.
Should I use ingredient props in every scene?
Only when they accurately support the product information. A quiet background and the real packaging can create a strong presentation without introducing additional ingredient or benefit associations.
Make your next soap session more organized
Choose the representative bar, list the important surfaces and capture the clear views before styling. You will have useful product information even if there is no time left for an elaborate scene.
The CraftToCamera Soap Photo and Video Content Kit on Etsy includes eight photo setups and eight video plans, along with planning resources. Use a relevant setup to organize the bar, surface detail and packaging views you need. The listing explains the current files and complete contents.